This tutorial will go over how to export your Gmail hosted mail and backup the data with GoodSync to a location of your choosing.
If you haven't already, download and install the latest version of GoodSync. For download and installation instructions, click here.
Exporting Your Gmail Data
1) Open your browser, and navigate to Google Takeout, Google's Data Export service.
2) Log in with the Google account that is associated with the Gmail data that you wish to export.
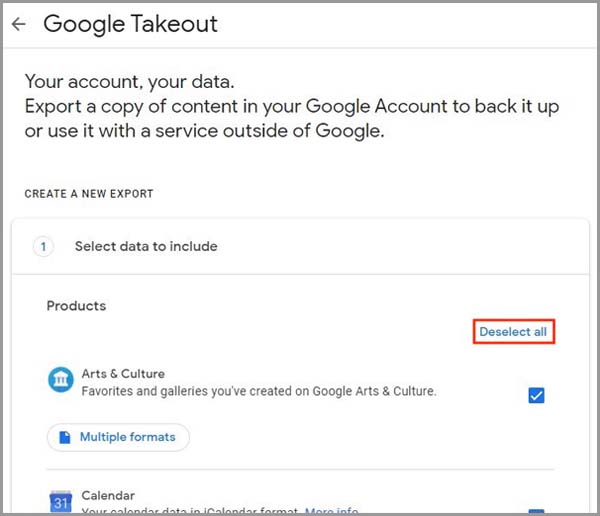
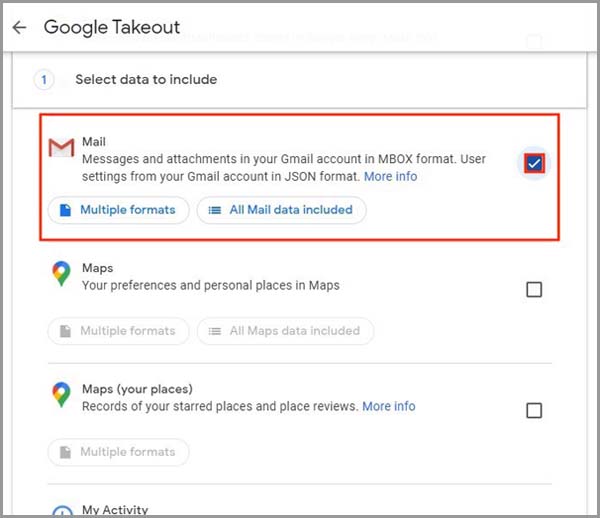
3) When presented with options for export, click “Deselect all” then scroll until you see the checkbox for “Mail” and select it.
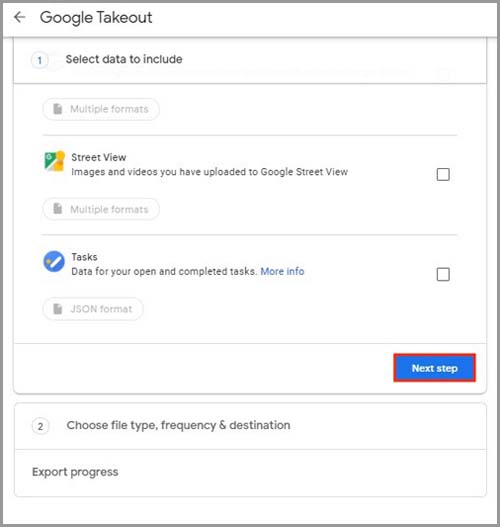
4) Once the checkbox for “Mail” is selected click the blue “Next step” button at the bottom of the screen
5) Google allows you to choose the file type, frequency, and destination of the exported file.
Under “Delivery method” you can set a destination for the data that is exported from Google.
Delivery Method Options:
- Download link via email
- Add to Drive (Google Drive)
- Add to Dropbox
- Add to Onedrive
- Add to Box
Select your preferred method. Later, you will download the file from the destination you chose.
Under "Frequency you can select to either "Export Once" or "Export every 2 months for 1 year." Choose the option which applies to you.
Under "File type & size" you can select either a .zip file (most common) or a .tgz file. Google also allows you the option of choosing the size of the export, ranging from 1gb to their 50gb limit. This means that if your exported data is larger than the size you select here, the export will be split into multiple files. Select the file type and maximum size that you would like.
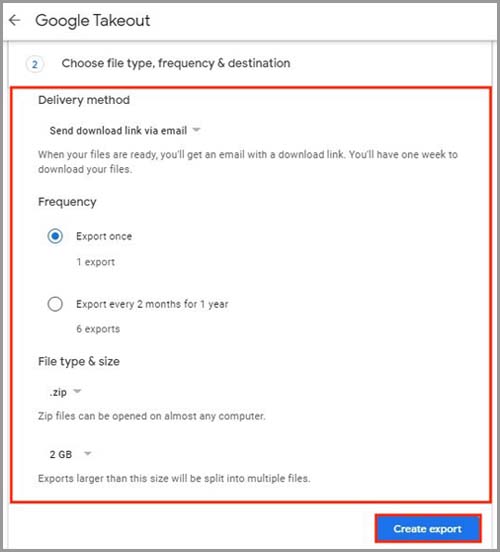
7) Click “Create export” to export the data. Google may take up to several days to compile the data and send a download link depending on the size of the export.
Once you have received your data, you can proceed to back up the data to another location of your choosing. We will be using Google Drive as the backup location for our example.
NOTE: For information on all supported systems, click here.
Creating a Backup Job in GoodSync to Back Up Your Gmail Data
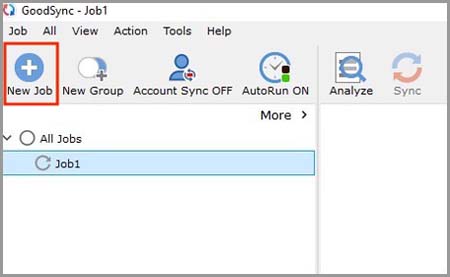
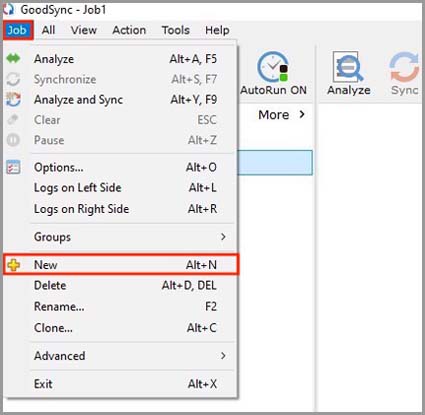
1) Open GoodSync, and click the "New Job Button" in the toolbar. Or, in the "Job" menu, select "New."
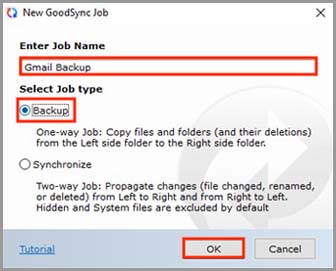
2) In the "New GoodSync Job" prompt enter the name for your new Job and select Backup as your "Job type." Then, click the "OK" button.
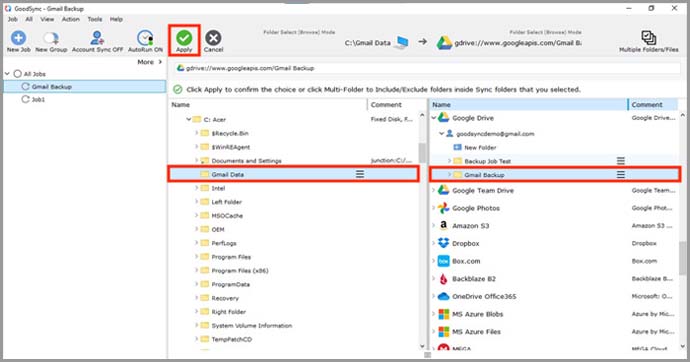
3) Next, select the endpoints for your job by clicking the Left or Right browse buttons at the top of the screen.

4) For the left side of the job within GoodSync, ensure that the exported data is in a folder as GoodSync can only select folders for sync and not individual files. Find the folder which contains your Gmail data and select it.
On the right, you can select any endpoint you would like. For our example, we'll use our Google Drive account.
NOTE: To view our tutorial on connecting your Google Drive account to GoodSync, click here.
Once you have selected both left and right folders, click the "Apply" button in the upper left.
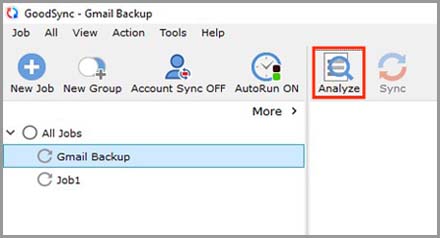
5) Click “Analyze” and confirm that the data will be moved appropriately.
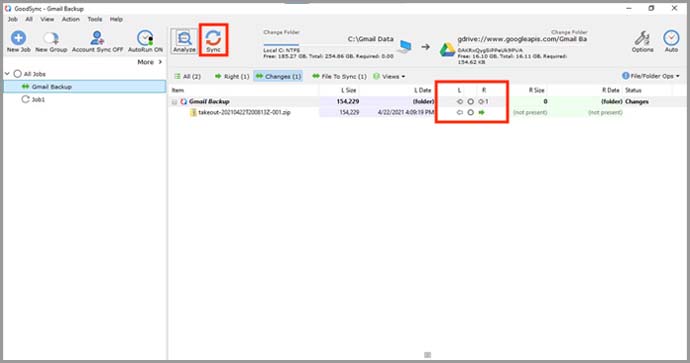
6) Once you have confirmed that the data will be moved appropriately, click “Sync” to commit the sync.
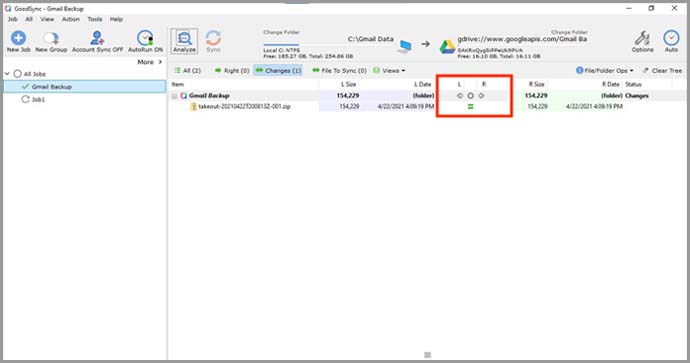
7) When you see the green equal sign between the L and R columns, the sync is complete.
NOTE: To learn how to configure the job with automation or other settings, click here.