Please note that GoodSync for WD is specifically designed for WD NAS*. A WD NAS is required to use GoodSync for WD.
*Supported models: My Cloud, My Cloud Mirror, EX2, EX2 Ultra, EX2100, EX4, EX4100, DL2100, DL4100, PR2100, and PR4100
First, make sure you have installed GoodSync for WD on your Windows computer and have GoodSync Account created. If you have not yet completed this step, you may review our installation tutorials here.
Next, make sure that you have installed GoodSync on your WD NAS device and register it with the same GoodSync Account. If you have not yet installed and configure GoodSync on your WD NAS, following our tutorial here.
On installation, GoodSync for WD will automatically create an template job called "My Cloud NAS sync job". This template job can be configured as desired to fit your needs. You may also click on "New Job" at top-left to create additional jobs.
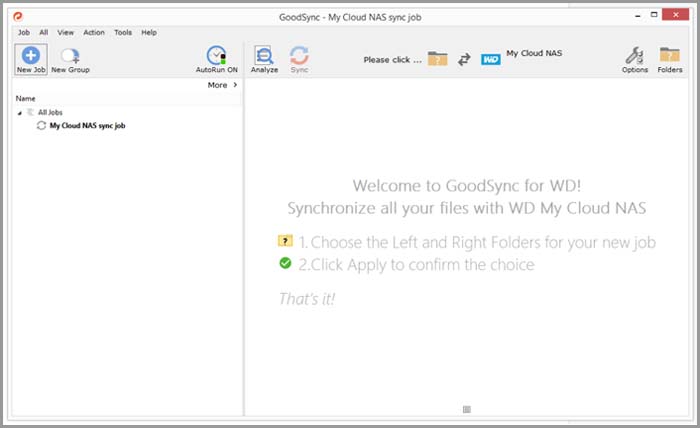
GoodSync for WD supports synchronization through network shares, Google Drive, Google Team Drive, Google Docs, Dropbox, GoodSync Storage, Amazon S3, Box.com, Backblaze B2, OneDrive, Office365, MS Azure, and to any device registered with your GoodSync Account.

This tutorial will demonstrate how to sync a local folder on your Windows computer with a folder on your WD NAS using GoodSync Connect.
1) First, click the "My Computer" drop-down in the left section and select the local folder you would like to sync with your WD NAS. We will use Desktop folder in our example shown below.
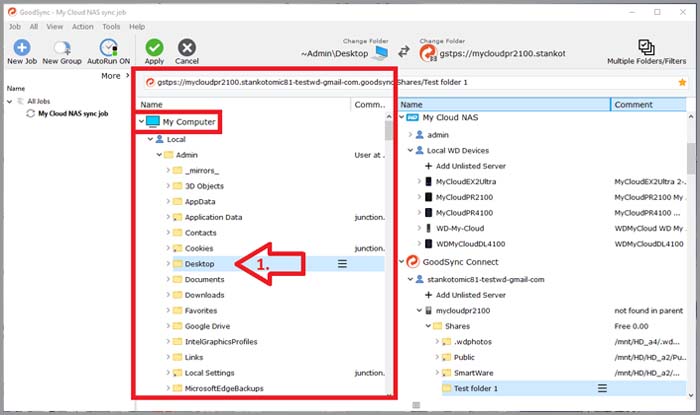
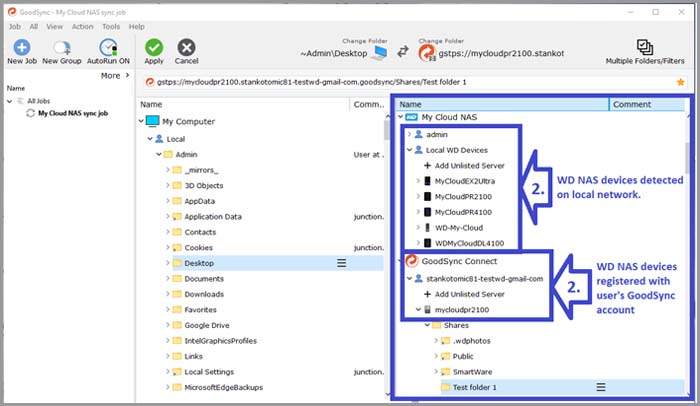
2) Next, on the right side select a folder that left side will be syncing to.
You can select from:
a) Locally discovered WD NAS device under "My Cloud NAS"
or
b) Remote WD NAS devices registered with your GoodSync Account (created during installation) listed under "GoodSync Connect".
(In both cases, an additional authentication might be required before data on the selected WD NAS will be listed).
NOTE: If you registered the same GoodSync account on both your Windows and on GoodSync app on your WD NAS device, you should see your WD NAS listed here under "GoodSync Connect". If that is not the case, please review the next step.
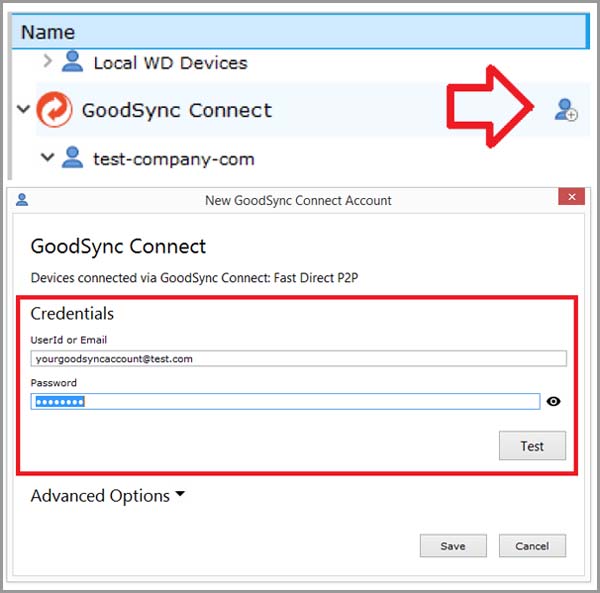
Alternatively, if you do not see your WD NAS listed under your GoodSync account in the "GoodSync Connect" drop-down, you may click on the "Add" icon to add the GoodSync account registered to your WD NAS.
3) Once you have selected your desired left and right folders, you may click "Apply" to complete the creation of this job.
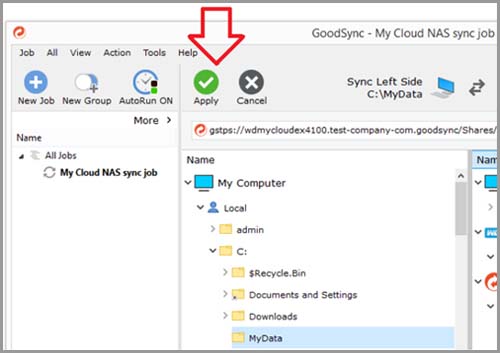
4) You have now created your first GoodSync for WD job!
Job can be run manually by pressing "Analyze" and then "Sync" buttons in the upper left corner or automatically by selecting one of the job automation options from the "Auto' menu located in the upper right corner.

For further documentation and details regarding GoodSync job options, please click here.
Interested in a comparison between free and paid versions? Click here!